Intermediate 📅 Last Updated: July 1, 2026 ⏱️ 14 min read 🪿 Goose
How to Set Up Goose as a Local AI Research Agent
⚡ Quick Answer
Install Goose with curl -fsSL https://github.com/block/goose/releases/latest/download/install.sh | sh, run goose configure to pick a provider (Ollama local model or cloud API), enable the filesystem and developer MCP extensions, set safe directories, then start a session with goose session. Total setup time: 15–20 minutes if you already have Ollama installed.
Who This Is For
Read this if: You understand what Goose is (see Article 6: What Is Goose AI Agent) and want to actually install and configure it for research tasks on your own machine.
Skip if: You have never used a local model. Start with Install Ollama first — Goose needs a model to talk to.
What You Need
- OS: macOS, Linux, or Windows (WSL2 recommended on Windows)
- Ollama installed with at least one model pulled (e.g.
qwen2.5:14b) - OR an API key for Anthropic / OpenAI / Google
- RAM: 16GB minimum (32GB+ recommended for local models)
- GPU: NVIDIA with 8GB+ VRAM for smooth local inference
- Node.js 20+ (some MCP extensions require it)
- Time: 15–20 minutes
🔬 Tested On
Machine: MSI laptop (dual GPU)
GPU: NVIDIA RTX 5070 Ti Laptop (12GB) + RTX 5070 (12GB)
CPU: Intel Core Ultra 7 255HX (20 cores)
RAM: 96GB
OS: Ubuntu 26.04 LTS
Date: July 2026
Step 1: Install Ollama and Pull a Model
If you have not already, install Ollama and pull a capable model. Goose works best with models that are good at tool use:
# Install Ollama
curl -fsSL https://ollama.com/install.sh | sh

# Pull a model that handles tool-calling well
ollama pull qwen2.5:14b

# Verify it runs
ollama run qwen2.5:14b "Say hello"
Full details in our Ollama install guide. For local research agents, qwen2.5:14b is our recommended default on 12GB VRAM.
Step 2: Install Goose
macOS / Linux:
curl -fsSL https://github.com/block/goose/releases/latest/download/install.sh | shWindows (PowerShell):
irm https://github.com/block/goose/releases/latest/download/install.ps1 | iexVerify the install:
goose --version
# goose 1.0.x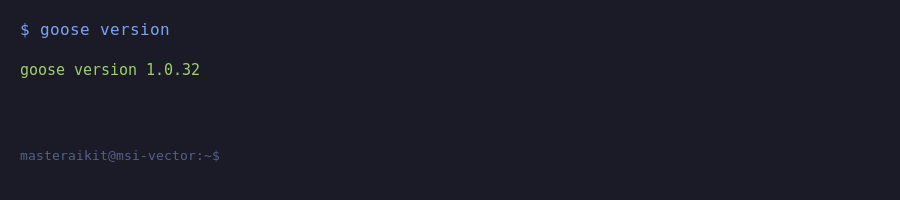
Step 3: Configure Your Provider
Run the interactive config wizard:
goose configureYou will be asked to choose a provider. Two main paths:
Path A: Local Model via Ollama (Private, Free)
Select Ollama as the provider, then choose your model:
Provider: ollama
Model: qwen2.5:14b
Base URL: http://localhost:11434
This keeps everything on your machine. No API costs, no data leaves your network.
Path B: Cloud Model (Higher Quality)
Select Anthropic and paste your API key. Cloud models like Claude Sonnet 4.5 are significantly better at complex multi-step reasoning — useful for hard research tasks.
Provider: anthropic
Model: claude-sonnet-4-5
API Key: sk-ant-xxxxx
For research where privacy matters (financial docs, personal notes), use local. For complex reasoning, use cloud. You can switch any time by re-running goose configure.
Step 4: Enable MCP Extensions (File Access + Tools)
Goose uses MCP extensions to gain capabilities. The two you need for a research agent:
# Enable the filesystem extension (read/write files)
goose extension add filesystem

# Enable the developer extension (run shell commands)
goose extension add developer
Enable them in your config file (~/.config/goose/config.yaml):
extensions:
  filesystem:
    enabled: true
    allowed_directories:
      - /home/USER/research
      - /home/USER/notes
  developer:
    enabled: true
Other useful MCP extensions for research:
- fetch — pull content from web URLs
- memory — persistent knowledge across sessions
- computercontroller — automate desktop tasks
Step 5: Configure Safe Directories (Security)
⚠️ This Step Is Critical
Goose can read, write, and delete files in any directory you allow. Get this wrong and you can lose data. Configure allowed directories explicitly — never grant broad access.
✅ Safe to allow:
~/research/— your research workspace~/notes/— your Obsidian vault or notes folder~/projects/— code repos you want Goose to work on
❌ Never allow:
~/.ssh/— private keys~/.config/— credentials, tokens, config/etc/— system files~/Documents/Finance/— unless you specifically want Goose there- Your entire home directory
~/
Set the allowed paths explicitly in config.yaml. Goose will refuse to touch anything outside the allowlist.
For deeper file-access safety, see our Local AI Security Mistakes guide (Article 9 covers Goose file permissions in depth).
Step 6: Start Your First Agent Session
Launch Goose from inside your research directory:
cd ~/research
goose session
Try your first real research task:
> Read every .md file in this folder, extract
  the key claims from each, and write a
  consolidated summary to summary.md.
  Include a sources list at the bottom.
Goose will: list the files, read each one, extract claims, write the summary, and show you what it did. You can approve or reject each file write.
Step 7: Useful Goose Commands
# Start an interactive session
goose session

# Run a single task and exit
goose run "Summarize report.pdf in one paragraph"

# Add a new MCP extension
goose extension add fetch

# Reconfigure provider / model
goose configure

# List enabled extensions
goose extension list
Common Mistakes & Errors
Error 1: "Provider not configured"
Cause: You skipped goose configure or it failed silently.
Fix: Re-run goose configure and confirm the provider and model. Check ~/.config/goose/config.yaml has a provider key.
Error 2: Ollama Connection Refused
Cause: Ollama service is not running.
# Start Ollama service
sudo systemctl start ollama

# Verify it responds
curl http://localhost:11434/api/tags
Error 3: Goose "cannot access file" Errors
Cause: The file is outside your allowed directories.
Fix: Add the directory to allowed_directories in config.yaml and restart the session. Never fix this by allowing ~/ broadly.
Error 4: Local Model Is Bad at Tool Use
Cause: Small models (7B and under) struggle with multi-step tool calls.
Fix: Upgrade to qwen2.5:14b or qwen2.5:32b if you have the VRAM. For complex tasks, switch to a cloud model.
Security Checklist
- ✅ Allowed directories are explicit and narrow
- ✅ No access to
~/.ssh,~/.config, or credentials - ✅ Confirmation prompts are ON for destructive actions
- ✅ If using cloud provider, API key is in config (not committed to git)
- ✅ Tested with a throwaway folder before pointing at real data
Recommended Setup (Tiered)
| Level | Model | VRAM | Best For |
|---|---|---|---|
| Minimum | Ollama llama3.1:8b | 8GB | Simple file tasks, summaries |
| Recommended | Ollama qwen2.5:14b | 12GB | Multi-step research, tool use |
| Quality | Anthropic Claude Sonnet 4.5 | Cloud | Hard reasoning, complex refactors |
What I Would Do
Start local with Ollama + qwen2.5:14b. Create a
~/researchsandbox folder, enable only the filesystem and developer extensions, and run 5–10 simple tasks to build trust. Once you are comfortable, add thefetchextension for web research. Keep cloud API keys for the hard tasks where local quality is not enough.
Frequently Asked Questions
How do I install and set up Goose as a research agent?
Install Goose from the Block GitHub repository or via pip. Run 'goose configure' to select your provider - Ollama for local or an API key for Anthropic/OpenAI. Start Goose in a project directory and give it research prompts from the terminal.
How do I connect Goose to local models via Ollama?
Ensure Ollama is running with a model pulled (e.g., 'ollama pull llama3.1'). In Goose config, set provider to 'ollama' and specify the model name. For research, use at least 8B models. Local models may struggle with complex multi-step reasoning.
What MCP tools should I add for research?
Add web scraping MCP for fetching pages, a search MCP for internet queries, and the filesystem MCP for organizing research notes. A PDF reader MCP helps with academic papers. Configure in Goose's MCP settings.
Can Goose conduct autonomous research without supervision?
Goose runs semi-autonomously, but you should review findings - local models can hallucinate facts. Set up Goose to save findings to files, then verify key claims manually. Goose works best as a research assistant you edit and fact-check.
Why is Goose not connecting to Ollama?
Verify Ollama is running ('ollama serve') and your model is pulled ('ollama list'). Check the model name in Goose config matches exactly (e.g., 'llama3.1' not 'llama-3.1'). Ensure Ollama API is at localhost:11434. Restart both after config changes.
📦 Goose Research Prompt Pack
The $19 Starter Kit includes 20 tested Goose prompts for research, summarization, and file management. Skip the trial-and-error.
Get the Starter Kit ($19) →🔧 Want This Configured For You?
Send me your specs and I will deliver a complete Goose config file — model, extensions, safe directories — ready to paste in. $99.
Get a $99 Setup Review →Want this guide as a printable checklist?
Get the free Local AI Setup Checklist delivered to your inbox.
Get the Free ChecklistLast Updated: July 1, 2026 — Verified against Goose 1.0.x and Ollama 0.4.0. Commands and config format current as of July 2026.